Projects

Modular Music Box – Synthesiser Control

We’re starting to make a serious push at the sound programming for the Modular Music Box.

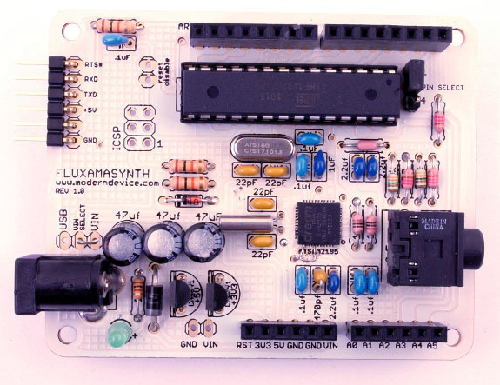
The audio hardware is a Rev. 1 Fluxamasynth, a bare-bones Arduino board hosting an Atmel ATSAM2195 General MIDI chip with rudimentary onboard effects. The chip interfaces to the Arduino via the standard serial-port library, which makes communication between the board and a host computer a bit of a problem: loading up Arduino sketches works fine, but the serial link is then used for MIDI. (The example code even brings up the link at the MIDI speed of 31.25 Kbaud, which might just be an in-joke; I very much doubt that the synth chip is opto-isolated!)

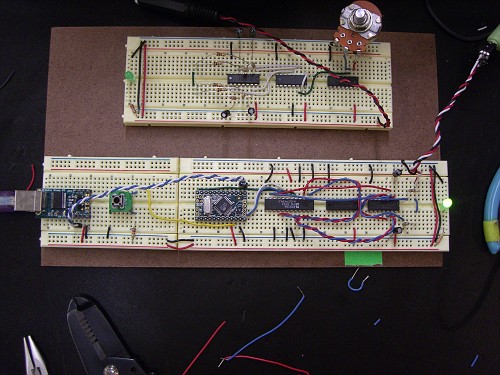
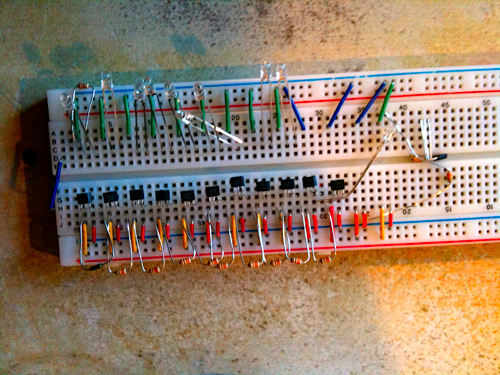
While it’s probably possible to get USB serial and MIDI serial communications running independently, that seemed like too much fiddling around. Since the Music Box relies on I2C for communication between its components, it made sense to bring up an I2C link between the Fluxamasynth and an Arduino Mega which I happened to have lying around. This was pretty much just a case of loading the Fluxamasynth with a basic sketch which passes all I2C bytes verbatim to the synth chip (I2C is 8-bit clean, so no armouring or wrapping is needed). The Mega uses a modified version of the Fluxamasynth “library” – in reality just a collection of MIDI message formatters – to put completed MIDI messages onto the I2C bus rather than serial. The breadboarding looks rather like this:
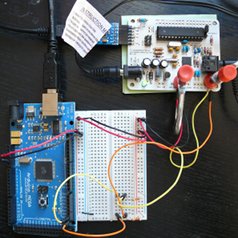
Fluxamasynth and Arduino Mega

Yes, the power, ground and I2C lines to the Fluxamasynth are held in place by miniature G-clamps since I’m in no mood to try and solder up pin strips right now. (more…)
Modular Music Box – Notes to Mike Cook 2

So sticking with the winder as a starting point I’ve collected together some of the components and internal fixings…

I supply..

The acrylic top plate with 12 orange 3mm LEDs and a rotary encoder glued in and wired up (all but the encoder button are soldered) – the one quirk being that I got the blue and purple strands of the ribbon cable out of order… so with the panel face up and micro usb breakout board etching at the bottom the LED configuration is:

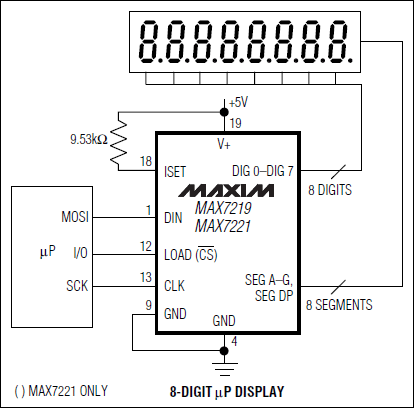
12 o’clock – white – anode – MAX7221 22 SegDP/white – common cathode – MAX7221 2 Dig0
1 o’clock – grey – anode – MAX7221 14 SegA/white – common cathode – MAX7221 2 Dig0
2 o’clock – blue – anode – MAX7221 16 SegB/white – common cathode – MAX7221 2 Dig0
3 o’clock – purple – anode – MAX7221 20 SegC/white – common cathode – MAX7221 2 Dig0
4 o’clock – green – anode – MAX7221 23 SegD/white – common cathode – MAX7221 2 Dig0
5 o’clock – yellow – anode – MAX7221 21 SegE/white – common cathode – MAX7221 2 Dig0
6 o’clock – orange – anode – MAX7221 15 SegF/white – common cathode – MAX7221 2 Dig0
7 o’clock – red – anode – MAX7221 17 SegG/white – common cathode – MAX7221 2 Dig0
8 o’clock – white extension – anode – MAX7221 22 SegDP/grey – common cathode – MAX7221 11 Dig1
9 o’clock – grey extension – anode – MAX7221 14 SegA/grey – common cathode – MAX7221 11 Dig1
10 o’clock – blue extension – anode – MAX7221 16 SegB/grey – common cathode – MAX7221 11 Dig1
11 o’clock – purple extension – anode – MAX7221 20 SegC/grey – common cathode – MAX7221 11 Dig1

(more…)

Modular Music Box – Notes to Mike Cook 1

Just to recap – there are 5 units

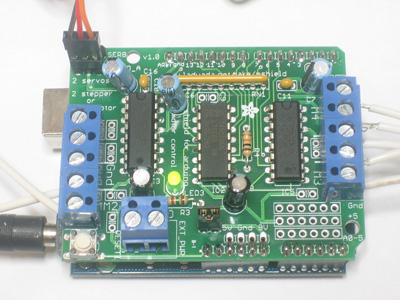
  • rotary sequencer – Arduino Mega 2010 + Adafruit Motor shield – I2C master
  • sound module – Fluxamasynth rev1.0 – I2C slave (this to check)
  • winder – Arduino Duemilanove – I2C slave
  • ballerina praxinoscope – via Adafruit Motor shield
  • battery

I’ll start with the ‘Winder’

Three main elements here for integration into a protoshield to sit on a DFRobot.com Arduino Duemilanove clone… :

  1. driving 12 orange 3mm LEDs – MV7744 – via a MAX7221 and the LedControl-library – or ideally a TLC5940 if you can get it to work with an I2C bus
  2. rotary encoder
  3. I2C

(more…)

Modular Music Box – Arduino polyphonic audio 2

While the Auduino project provides plenty of code tweaks and hardware hacks to make an easy to use but versatile monophonic synth the Modular Music Box requires polyphony…

So I’ve been on a mission to try and find a suitable solution…

(more…)

Modular Music Box – Hall Effect Sensors

I wanted to test the hall effect sensors I’d bought to see if they could be used for my idea of a rotary magnetic sequencer for the Modular Music Box.

There’s a link to the data sheet and a handy Hall_ Applications_Guide.PDF as well as some useful advice on the Sparkfun Hall Effect Sensor page and in the comments… and the Arduino:Playground provided a bit of code to test the sensor in action…

“You’ve got 3 pins from the front (the triangle edge). Left to right, power, ground, output.
Stick a 10k pull up between 5v and output. Then it’ll latch on/off depending on the poll you use.”

(more…)

Modular Music Box – MAX7221

The ‘Winder’ in the MMB has a ‘clock face’ of 12 orange LEDs in a circle used to give visual feedback on which way and how much to wind the key… as well as display the ‘winding down’ of the mechanism.

While I could have managed this by using an LED per digital output on the Arduino Duemilanove clone – I thought I’d use it as an opportunity to work with and learn more about LED drivers.

(more…)

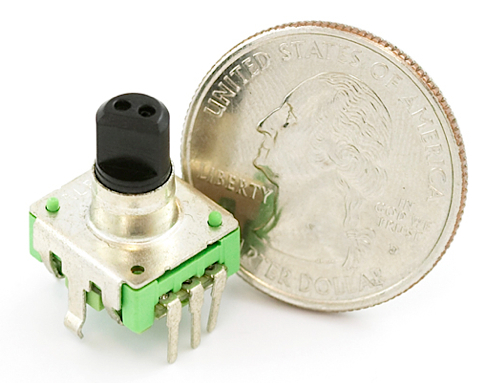
Modular Music Box – Quadrature Rotary Encoder

The Rotary Encoder page at SparkFun has a datasheet, tutorials and additional info and advice in the comments:

  • though medecau’s QuadEncoder Arduino library doesn’t compile…
  • tronixstuff’s Chapter 11 section on the rotary encoder – and the code works well enough – though there’s a fair amount of ‘bouncing’…
  • but with a little additional research I managed to get the Reading rotary encoder on Arduino example code to work – and it does seem to provide the most consistent and ultimately useful response to encoder input for my needs.

(more…)

Modular Music Box – Power Requirements

Although electronics is not really my strong point, I spent some time working through the spec sheets for all the various components in the Modular Music Box in an attempt to work out total power consumption – to give a better idea of the battery mAh rating we’d need and some idea of how long they’d last…

Things have changed since this early list and I’m sure I haven’t taken everything into account – the LVBoost now in the battery pack is probably only running at ~60% efficiency for a start – but here’s my initial working out for the record…
(more…)

Modular Music Box – Powering Arduinos

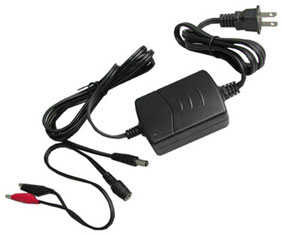
While for testing purposes the Polymer Lithium Ion Battery – 2000mAh sku: PRT-08483 and LiPoly Charger – Single Cell 3.7-7V Input sku: PRT-00726 may do… further reading of Comments and datasheets suggests they may not be a final choice.

Cons

  • ~6hrs charging a 2000mAh battery at 280mA max
  • JST connectors can be *extremely* difficult to remove!

Pros:

  • Battery includes built-in protection against over voltage, over current, and minimum voltage.
  • useful 3 connectors – one to battery, one to circuit, third for 5V that powers the charger – so can charge the battery and power device at the same time.
  • through holes in the PCB for remote LED

So looks like we’ll need something more like:

which seems a bit expensive all in… particularly since we’ll require two battery packs – one in use and one on charge… (more…)

Modular Music Box – Stepper Motors

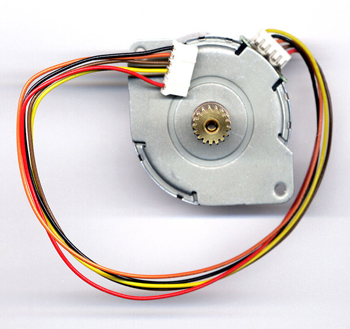
While worth buying to test the Adafruit Motor/Stepper/Servo shield and get some hands-on experiments done I suspected the Solarbotics GM17 might not be the best motor for the job(s) in the Modular Music Box – requiring +9V, having little torque at low speed and being quite noisy – though it is quite compact and did just manage to fit centrally in the monome size casing alongside an Arduino Duemilanove clone…

Further research suggested that a stepper motor would be the best choice to drive the sequencer and animation turntables. In the interim I tested a stepper motor from Fab Lab Manchester – the six wire PF35T-48L4 – a 7V (though it will supposedly run as low as 5V) 20ohms UNIPOLAR, S/A 3.6deg stepper motor. The makingthings.com Stepper Motor How-tos helped me identify the yellow and orange as one pair, the black and brown as the other and the red and green wires as the center taps.

(more…)

Modular Music Box – Arduino polyphonic audio 1

Before I emailed Pablo Gian Villamil and he sent me on a link to his class notes (yay!) for Generating polyphonic sound with Arduino I tried to work out his circuitry from his various blog posts and component listings…

(more…)

Modular Music Box – Adafruit motor/stepper/servo control

I bought a small 3-4.5V DC motor to start testing for the rotary magnetic sequencer I’m planning as part of the Modular Music Box for the Analogue is the new Digital exhibition as part of AND Festival…

Todbot’s Bionic Arduino: Introduction to Microcontrollers with Arduino: Class 3 has a section on Controlling a Motor using a 1N4001 ‘kickback’ diode and TIP120 transistor to “control speed of motor with analogWrite() just like controlling brightness of LED” which I still need to try out.

Then there’s a fairly thorough post at Lucky Larry’s ARDUINO, MAINLY ARDUINO PROJECTS, TUTORIALS… AND A FEW OTHER THINGS blog – Control a DC motor with Arduino and L293D chip… but (sigh)… I think I’ll just buy a shield kit.
(more…)

Modular Music Box – Planning

First stage planning for fabrication, electrical components, Arduino code and general thoughts for the various modules of the Modular Music Box.

Rotary Magnetic Sequencer

mounting

  • walnut box – sides + base – (same dimensions as monome?)
  • subtle Art Nouvea/William Morris style laser etching embellishment?
  • top panel – Alupanel® aluminium composite (can this be cut on the Fablab laser cutter? – NO)/translucent acrylic
  • playback head – to hold 12 x hall effect sensors, 12 x 10k(?) resistors, 12 x 3mm orange LEDs, 12 x 150 Ohm resistors – double check resistor value for multiple LEDs in parallel – cabling
  • melody disks – 64 step – 12 x 3mm x 1mm disk magnets per step – 3 layers of 1mm clear acrylic – edge clips to fold three layers together? have Illustrator prototype template

(more…)

Modular Music Box

We’ve been invited to contribute to the ‘Analogue is the new Digital’ exhibition as part of the AND Festival in Manchester in October ’10. It’s a modest fee of £400 and Nick and I are still deciding what work we could produce.

We’ve proposed a couple of ideas i response to the brief… attached as a PDF – analogue-digital

(more…)

PEAL – Bell Posts – Fabrication…

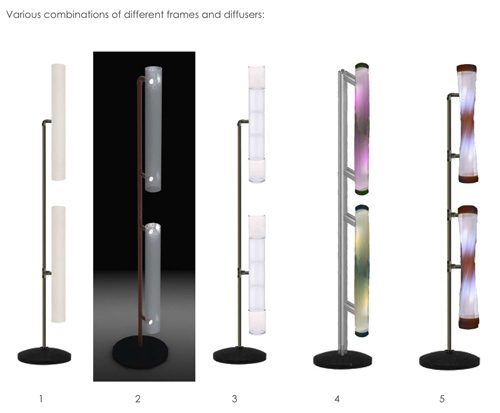
PEAL-design-options

One particular area of concern has been the design and construction of the eight ‘bell posts’… and with budget tightening and schedule contracting we were keen to make sure this was one aspect of the project that didn’t get squeezed too far. The bell posts are the main physical manifestation of PEAL – the sculptural and physical elements of the piece that the audience interact with ‘up close and personal’ – and so we want to make sure they have the design aesthetic and quality of build we’re aiming for with the project overall.

Nick and I approached several designers and fabricators through out mutual networks and have now engaged with Duncan Fitzsimons – a graduate of the MA. Industrial Design Engineering, Royal College of Art and a member of Vitamins design – a multi-disciplinary design collaborative based in London.

(more…)

PEAL – Branding, Graphic Design & Visualisation

PEAL-logo-rough

Malcolm Garrett, RDI – Creative Director at Applied Information Group (AIG) has been developing the PEAL branding and graphic design for the ‘monitor’ output – and though still in development we think its circularity and clean, minimal vector aesthetic and historical font are right on tip. There are a series of variations for each of the installation modes: idle (above); self play, guided play, performance and timepiece.

(more…)

PEAL – Bell Posts: The First Technical Drawing

Bell Posts: The First Technical Drawing, originally uploaded by Monomatic-flickr.
We need to get moving on getting the kit built, especially as there may be some lead times on ordering components. So, here’s a rundown on what we currently have in mind for the design. (This is a very low-tech diagram: if necessary, I could sepia-tone it and we could pretend it’s a page from Leonardo’s sketch book.)

(more…)

PEAL – Lewis’ Update

Video_Binloop_500px

Interesting possibilities emerging for triggering and synchronising video via the in-house Alpine McBride Video Binloop 16 track video player which uses Compact Flash cards…

Steady progress… still some things outstanding according to my reQall list… but hoping to catch up this week.

1. Confirming Church participation and dates for visits and filming.

a) I’ve already visited St Peters Church aka Leeds Parish Church (LPC)

St Peter’s Church (Leeds Parish Church), Kirkgate, LS2 7DJ
12 bells
Practice: Thurs 7:30
Visit: Thursday, 9th July, 7.30-9pm
Filming: either Sunday, 9th or Sunday 16th August, 1-6pm

b) Through Steve Ollerton, Tower captain at St Peters (Leeds Parish Church) I’ve now made contact and arranged a visit and reconnoiter with a further three churches:

(more…)

Lewis went to Leeds on Thursday, 9th July to…

[flickr]photo:3709302925[/flickr]

  1. Visit the Leeds City Museum and discuss technicalities with Tom Pace, Senior AV Technician
  2. Meet with Sue Ball from MAAP
  3. Visit Leeds Parish Church for a practice bell ringing session and meet with Steve Ollerton, Tower Captain and the group
  4. Visit other possible churches – time permitting…

Resulting in the following notes (they’re quite extensive – sorry):

(more…)

MonoScape – monome meets 3D-AudioScape

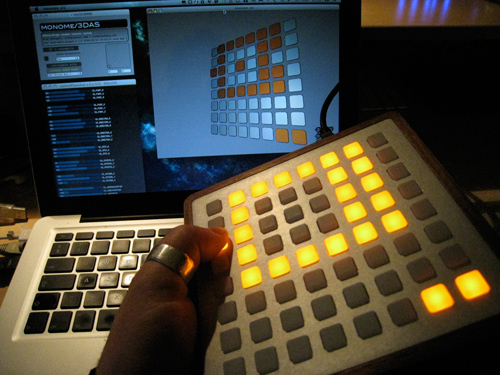
Nick Rothwell has developed an application for a monome64 to trigger and position sounds within the Illustrious’ 3D-AudioScape surround sound system.

monome-3das

My camera can’t quite capture all the button flashes – but you get the idea…

There’s an initial schematic of the button layout and functionality as PDF… though this was just a starting point and has since been superseded.

Nick used shado – his own open-source compositing and sprite library – to enable the monome to trigger up to eight individual sounds (via MIDI note-on on separate MIDI channels), set their volume  (controller #7) and allow each to be positioned both within the x-y plane (controllers #2 & #3) and z plane (controller #4) of the sound field (3D-AudioScape is unique in that it also has a z-axis positional component due to its two rings of speakers – one on the ground and one in the air). The app also has a mode for calibrating the output of the monome64 accelerometer to allow the position of a sound in the x-y plane to be controlled via tilt.

(more…)

Email exchanges – May

Some of our email exchanges posted here for the record…

7 May – Anthony:

And Monomes….  I’m planning a Summer of fun.  Battleships, discome and the 3D-AudioScape interface on the agenda at the mo – hopefully in Processing or OpenFrameworks – are these still all live ideas?

15 May – Lewis:

Yes I’d like to move these forward too… 

3D-AudioScape interface seems the most solid in terms of agreed funding… and I’m still keen to develop an application schematic for phase 1 based on the blog.monomatic.net post as a starting point…

(more…)

Monome meets 3D-AudioScape

We’ve been developing the idea of using the monome to position and trigger up to 8 sounds within the Illustrious 3D-AudioScape facility… and Martyn Ware is up for it…

3D-AudioScape

The Illustrious Company’s 3D-AudioScape surround-sound system                      

Built by Paul Gillieron Acoustic Design and refined by Illustrious, the 3D-AudioScape surround-sound system comes closer than any other to the holy grail of ultra-realistic sound. It achieves this through two rings of speakers, one high and one at ground level to create a three-dimensional (X,Y and Z) virtual sound space. Illustrious’s unique visualisation/spatialization software positions up to sixteen separate sound channels within this virtual space which are then are able move in any direction, including up and down, in real-time. 

(more…)

Email exchanges – March

Some of our email exchanges posted here for the record…

17 March – Anthony:

Finally got to your thread on the blog.  Here’s my thoughts:

Using the Monome to control sound on Martyn’s 3D-AudioScape should be technically fairly straight forward, as would the visualisation grid.  MIDI to OSC is no problem.  I don’t know much about DMX, but I think I did a student project a couple of years ago that used DMX…  or there are hardware solutions to convert between MIDI/DMX (e.g. http://www.lanbox.com/products/LCDataSheet.html – about GBP350 – no idea how good they are).  I’ll have a think…

I’m interested in that hack that allows you to control per LED brightness – that would rock; have you got it to work? It might make my camera thing make sense for a start.  I’ll fiddle with the accelerometer thing too – it wasn’t incorporated into the download when I first installed the Monome, so I haven’t used it yet

As for discome – getting the Monome to trigger discrete animations onscreen is fine, but doing any kind of animation on the Monome itself is doable but won’t look any good – as you found out yourself, 8×8 is very small to make meaningful graphics…

20 March – Anthony:

this is interesting :  http://monolake.de/installations/cyclone.html

i’m warming to the 3D sound interface idea

(more…)

discome (I Feel Love)

As part of discome project I’m working on a version of Donna Summer’s 1977 disco classic I Feel Love

Summer/Moroder

Here’s an interesting Wikipedia article on the track… which says that this is the first disco-style song recorded with an entirely synthesized backing track!

In attempting to de/reconstruct it in Ableton Live I’ve come to realise what a groundbreaking production Giorgio Moroder and Pete Bellotte actually created for its time. There is so much complexity and subtlety within what initially seems to be the fairly straightforward instrumentation and arrangement – which is why I suppose it’s such a classic and timeless track – der! So I’ve resolved to do my upmost to create a worthy monomatic version to reflect this… something I’ve just not found in those few remixes and reworkings I’ve actually listened to – of which there are very, very many…

Here’s the orginal… and my working rough…

[display_podcast]

(this is just a first draft instrumentation and arrangement and is far from finished… but it’s coming along well I think)

Next I’ll be attempting to create robotic renditions of the main and harmony vocal lines using Repeat After Me 1.3 – Apple’s phonetic Text To Speech app bundled in the OS X Leopard Developer Tools.

discome

discome is the meeting point between the minimalist interfaces of monome and the pixelised design of sensomatic’s discomatic.

The momome is a beautifully designed, hand-crafted, minimalist interactive interface for controlling and monitoring pretty much anything audio, visual and beyond… a reconfigurable grid of backlit keypads which connects to a computer. Interaction between the keys and lights is determined by the application running on the computer – there is no hard-wired functionality.

discomatic is a graphic design project which aims to build an entire dancing robot army for world domination and flood the world with disco!

discome brings them together – using the interactive interface of the monome to control and respond to 21st century disco music and the funky dancing of the discomatic robot – for endless hours of realtime disco fun!